Session-15_Build_Your_Own_Flying_Machine_Part_1.pptx
Build Your Own Flying Machine
"The desire to fly is an idea handed down to us by our ancestors who... looked enviously on the birds soaring freely through space."
— Wilbur Wright
This quote by Wilbur Wright, one of the legendary Wright brothers who built and flew the world’s first successful powered aircraft, captures the deep-rooted human aspiration to conquer the skies.
When you're building your flying machine, this quote reminds you that you're part of a long-standing human dream—turning curiosity, imagination, and observation of nature into engineering innovation. From flapping wings to fixed-wing aircraft, and now to drones and flying robots, every flying machine is a tribute to that timeless dream of flight.
Introduction
In this lesson, students will build a scale model of the F‑22 Raptor RC plane using coro sheets and electronic components. This hands-on session introduces basic concepts of aircraft structure, electronics integration, and aerodynamics. It promotes technical confidence, problem-solving, and teamwork by guiding learners through a complete aircraft assembly process.
Prerequisite Knowledge
- Basic understanding of aerodynamics (lift, drag, thrust, and weight).
- Familiarity with servos, motors, and battery functions.
- Basic knowledge of transmitter and receiver systems.
- Comfortable handling tools like glue guns and cutters.
Learning Objectives
- Understand the structure and design of an RC aircraft.
- Learn how to install motors, servos, ESCs, and receivers.
- Identify the importance of CG (center of gravity) and balance in flight.
- Learn pre-flight checks, safety protocols, and trimming techniques.
- Understand the function of elevons and propulsion systems.
Tools & Materials Required
- Coro sheet or Depron for airframe
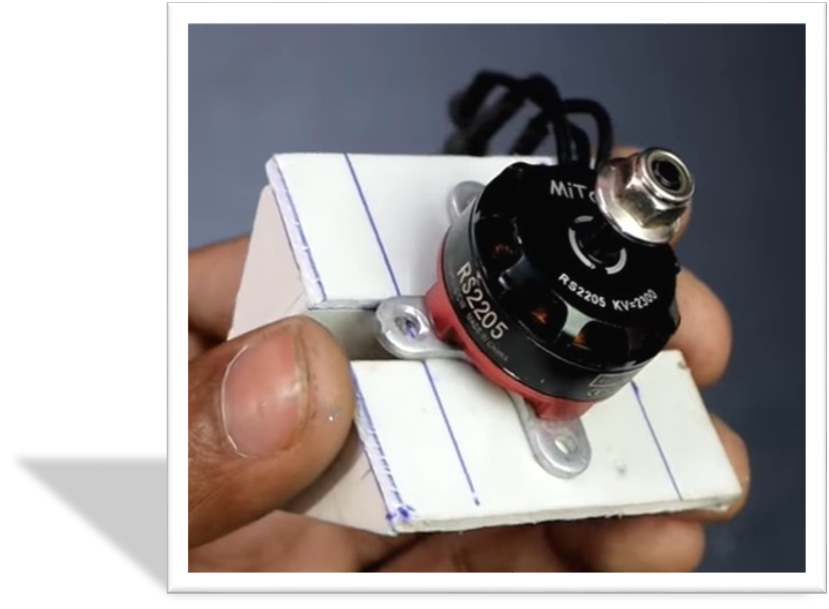
- Brushless outrunner motor (e.g., 2200KV)
- 3-phase ESC (Electronic Speed Controller)
- Propeller (8×4 to 10×6)
- 2 micro servos (9g) and pushrods
- 6-channel radio transmitter and receiver
- LiPo Battery (3S or 4S)
- Velcro, glue gun, CA glue, sunboard (for mount)
- Bamboo sticks/carbon spars for reinforcement


Step-by-Step Procedure
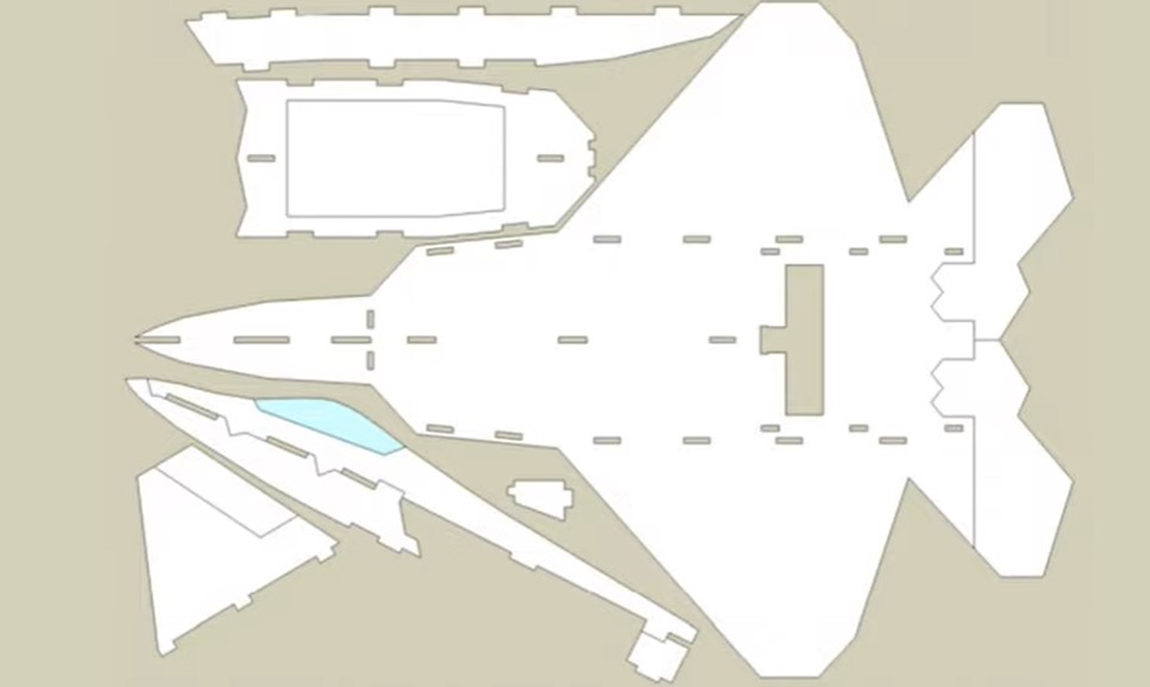
- Start with printing or designing your F‑22 Raptor template and cut the parts from the coro sheet (fuselage, wings, tail).
- Reinforce the wings by inserting bamboo or carbon rods for strength and durability.

- Glue parts together carefully using hot glue, keeping the fuselage aligned to the centerline. Cut wings at a 45° angle for proper aileron movement.
- Prepare a motor mount using sunboard, install the brushless motor securely, and connect it to the ESC.
- Install 2 micro servos for the elevons (combined elevator and aileron), connect pushrods to control horns, and secure wiring.

- Mount the ESC, battery, and receiver in proper channels (1 & 2 for servos, 3 for ESC). Secure with Velcro.
- Ensure the plane's center of gravity is 30% back from the wing’s leading edge. Adjust battery placement for balance.

- Set up control surface mixing on the transmitter for elevons to handle pitch and roll correctly.
- Attach propeller and ensure ESC provides proper power to receiver and motors.
- Perform full pre-flight checks including control directions, motor spin, loose parts, and charge levels before launch.
Outcome
- Students will be able to identify all the parts of the rc plane.
- Students will be able to assemble all the parts of the rc plane.
- Students will get an in hand experience of applying applications of aerodynamics in real life objects.
There are no comments for now.